Corel Painter 12: The Best Yet
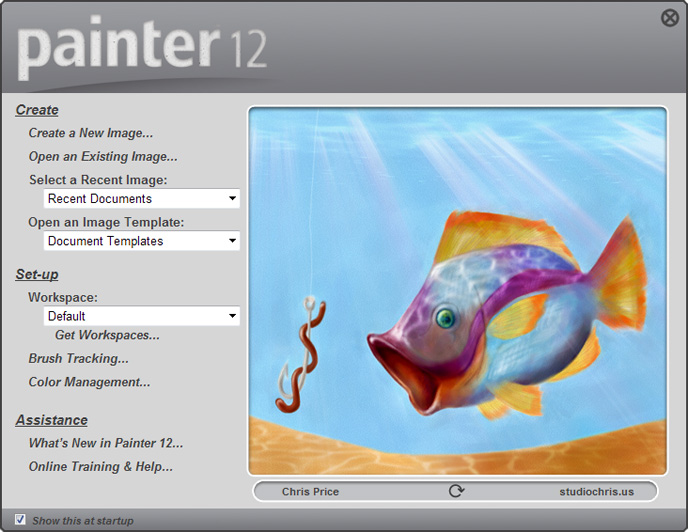
Corel Painter 12 was released earlier today, and is a massive overhaul of the Painter we all know and love. The Painter team addressed quite a few long-standing requests and issues in this version, all exciting and all pulling together to create the best version of Painter yet!
The Interface Overhaul
The biggest, instantly noticeable change is the brand new user interface. It takes on a more modern look with unique, stylized icons and leaving behind the mismatched default system windows. Palette windows now have dark title bars which match across both the Mac OS and Windows platforms. The darker color helps palettes fade into the dark gray background outside of the canvas (for those that use a windowed viewing mode).
Panels, a slight terminology change for individual palette containers, have lost the long title bar in favor of tabs which can be docked side by side inside of a palette window or one on top of the other to create groupings. This space-saving feature also solves a frustrating usability problem of individual panels being too easy to accidentally expand, collapse and move around the workspace while interacting with them. Now instead of a single-click, a double-click is required to collapse or expand a panel. Small changes like this are sprinkled throughout the interface to make the Painter experience more enjoyable.
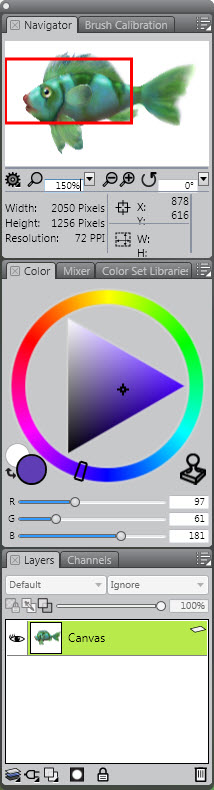
Other areas such as the toolbox and the various media library selectors also received updates. By default, the new toolbox is a single column with larger icons that should be easier to select quickly with a Wacom pen. The new arrangement takes up as little space as possible, leaving a larger working area for the main canvas.
While talking about Wacom pen friendliness, all of the main controls, like sliders, have been slightly enlarged as well. For sliders in particular, both the draggable thumb and track are larger, making more accurate value selections easier with a pen. Again, small details go a long way.
One last area of interest in the new interface are the docking bars both at the top of the Painter window as well as the bottom, which returns from older versions of Painter. These new docks are sticky – the brush selector will stay put!
Brush Selector
The Brush Selector received a massive overhaul along with the rest of the interface. Now, both categories and individual variants are seen at the same time instead of having to open two separate dropdowns. This will be a huge timesaver. Also included above the lists is a row of the 10 most recently used brushes (these are also in the property bar of the main interface in the Default workspace). The Recent Brushes selector works exactly like the Tracker palette from Painter 11 and is the Tracker palette’s replacement.
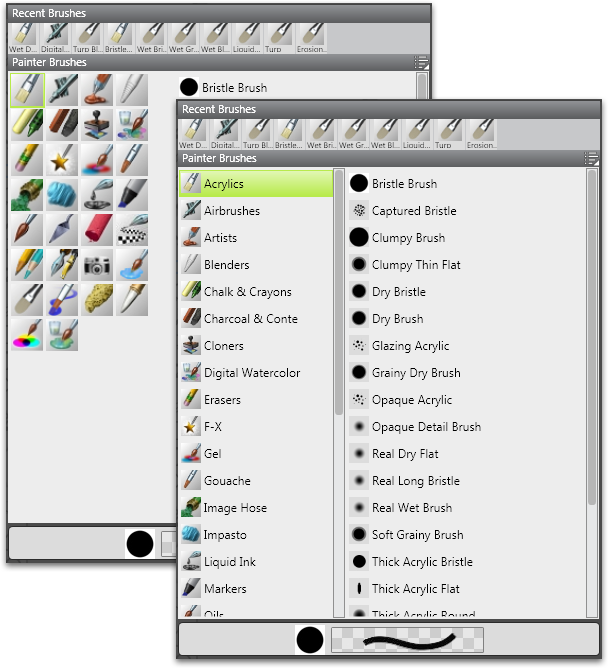
Along with the redesign, the Brush Selector also helps keep brush libraries and categories organized. The display order of categories and brush variants can be changed to the user’s preference through drag and drop right in the Brush Selector panel. In Painter 11, this was available in a separate dialog window, which was a little clunky and often forgotten. Now the action is front and center and where it matters most.
Stroke Attributes and New Digital Airbrushes
For years, one of the biggest questions asked by new Painter users coming from Photoshop has been, “How do I make the brushes in Painter act like Photoshop brushes?” Before, there were tricks here and there that one could use, but the results were never really the same. The times have changed!
In Painter 12, brush controls have been greatly expanded with the introduction of a brand new circular brush dab and stroke attributes. The Computed Circular dab has settings for both hardness and opacity, and opacity means what it says – strokes can now be partially transparent and brushing over the same area more than once in the same stroke will not build to a totally opaque color.

Along with stroke opacity, new Merge Mode controls have been added through a simple dropdown menu in the General brush controls panel. These allow complex color interaction and color mixing on the canvas through all 22 of Painter’s composite methods/blending modes. In past versions of Painter, the only way to achieve these effects was by using separate layers for each blending mode; not anymore. Use Multiply mode to create color washes that combine colors much like watercolor or use Overlay mode with a light color to create glows quickly and easily without having to track down the Glow brush.


Now for the icing on the cake: Just imagine canvas texture interaction, the already powerful color blending features of Painter and the accurate stroke opacity of Photoshop combined into a single brush. That’s right, stroke attributes work with most of Painter’s huge library of brushes with all of their complex features including grain, resaturation, bleed, bristle sprays, artist’s oils, clone color, pen pressure, rotation, speed and on and on and on. It’s a digital painter’s dream come true.
Real Watercolor
Painter is all about replicating natural media. For the past few releases new “Real” brush categories and types have been added, including Pencils and Hard Media in Painter 11. Painter 12 continues forward with new Real Watercolor brushes.
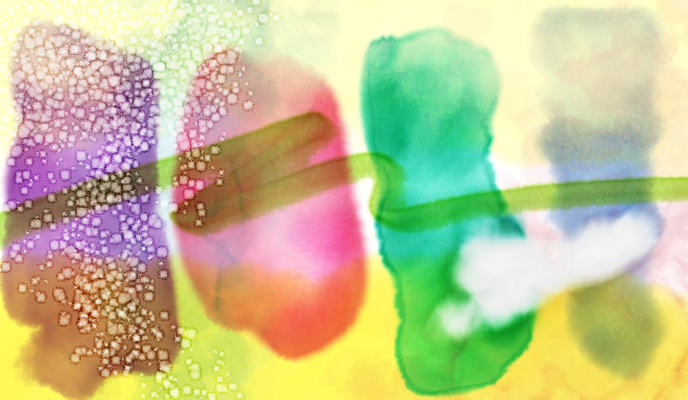
The new Real Watercolor brushes are, in a word, AMAZING!!! [yes, that was necessary – that’s how good they are] To let them speak for themselves:
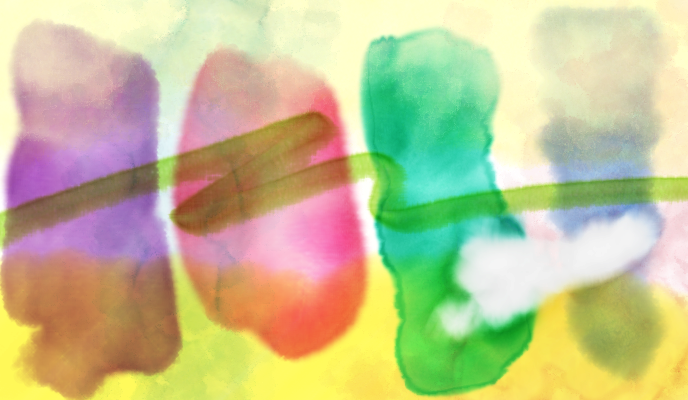
Wet, darkened edges, texture from paper, flowing pigments and simulated soak-in all from a single brush stroke. This is the most realistic digital watercolor available today in any digital painting software. Water flows, evaporates and soaks into the canvas as if it were real paper, and of course, it’s taking color along for the ride. As water pools, so does the color which leaves rich, pigment-saturated fringes around the edges.
The diffusion and evaporation process can be paused over the duration of several strokes by using the pause icon in the brush property bar at the top of the Default workspace. When unpaused, all strokes will diffuse, evaporate and mix together as if they had all been laid on top of a wet piece of paper at the same time.
Next, the color model for Real Watercolor is a huge improvement from the normal Watercolor brushes. With the traditional Painter Watercolor brushes, color builds very quickly leaving a muddy, or completely black, mess on the canvas with saturated color. Real Watercolor, on the other hand, builds smoothly and more realistically. Final colors after diffusion are pure and turn out as expected.
The traditional Watercolor brushes are still available as well. Both Real Watercolor and Watercolor can interact with one another, so favorite effect brushes from the Watercolor category, like Eraser Salt can still be used just as it would normally.
[I could continue gushing over these brushes for another 20 pages; I love them! Hands-down, this is my favorite new feature and I can’t wait to see how everyone will use them and the gorgeous works of art that will be created with them.
Bonus: If you are interested in Painter’s watercolor abilities, be sure to watch Joan A. Hamilton’s Digital Painting Site. Joan is a Painter Watercolor expert with the old-style watercolor brushes. With these new and improved brushes in hand, I can’t even imagine what she’ll come up with, I can’t even imagine what she’ll come up with, but I know it will be top notch and amazing – she does tutorials too!]
Real Wet Oil
Building from the technology in Real Watercolor, Real Wet Oil has many of the same qualities of Real Watercolor except Real Wet Oil is opaque and it doesn’t require a special Watercolor Layer. Real Wet Oil diffuses and blends much like, well, real wet oil paint running and mixing across a canvas, and it does it all by itself! With settings adjustments, the wetness of the applied paint can range from creamy oil to almost watercolor.
Along with brushes that apply color, Real Wet Oil also contains a few new blender brushes that act as turpentine (or water) on anything that’s available on the canvas. These both move color around the canvas and blend at the same time. The final result of the Turp brushes can look blurry, so take care to use them sparingly or be prepared to paint detail in on top of the blended color.
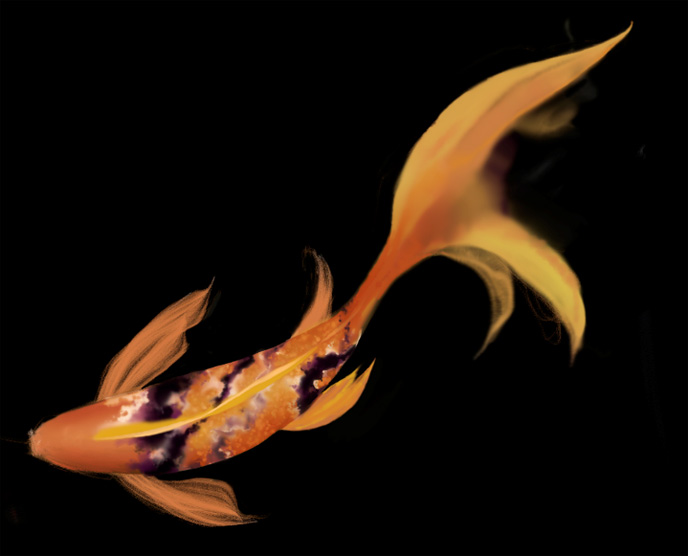
Beyond oil painting, the Real Wet Oil brush settings are a huge leap forward. Never before has Painter specifically allowed both wet and dry media to interact with one another on the canvas, at least not with this much freedom. Real Wet Oil is not limited to only oil painting. For instance, the Turp brushes will spread pencils and chalk as if they were watercolor. Start a “to be wet” painting with a favorite brush, add some Turp here and there for blending and on to another brush. It’s digital mixed media at its finest.
Mirrored & Kaleidoscopic Painting
Kaleidoscopic painting has been available to Painter users through a special plugin layer for a long time, but the painting was confined to the specific plugin layer, which may or may not cover the entire canvas. With this release, the Kaleidoscope plugin layer is obsolete. The brand new Mirror Painting Tool and Kaleidoscope Painting Tool are available in the toolbox with all of the other tools. No special layer is needed, even for kaleidoscopic watercolor painting. Just choose the tool and paint on the canvas like with anything else!
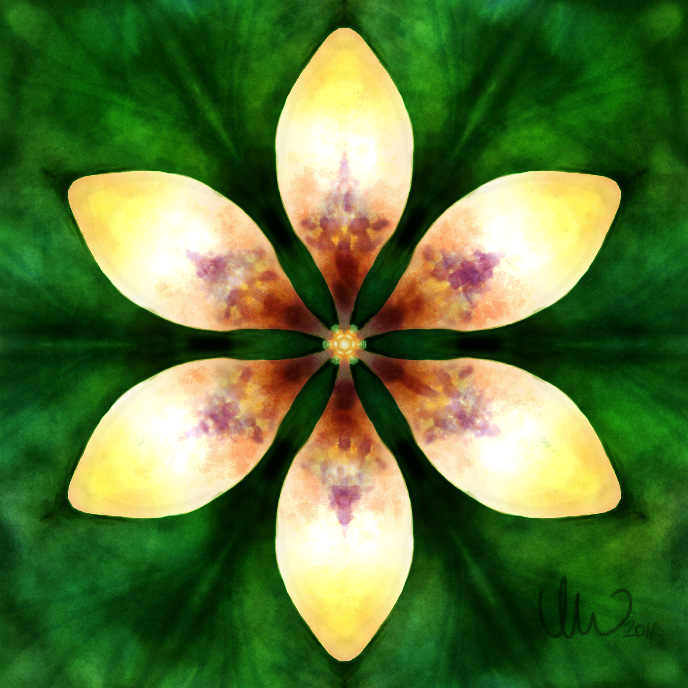
Kaleidoscopic painting with Real Watercolor in Painter 12 is quite intelligent. Even though the Lily in the example painting above was painted to be completely symmetric from 6 angles, notice the variety in the coloration of the petals. They are similar, but not exactly the same. This lends to a more realistic look in the end. Experiment and see if any other brushes give randomized looks.
Custom Palette Customizations
That’s a mouthful! Custom palettes are sets of tools and commands collected together in one place. One common use is pulling together a favorite set of specific brushes and settings for a particular painting style. In the past, when multiple brushes from the same category were added to a custom palette, their icons all looked exactly alike so it was difficult to tell different brushes apart quickly.
New custom palettes in Painter 12 solve the confusion by allowing icons and buttons to be customized completely. Now separate brushes can have separate icons that the user can distinguish quickly.
Under the Hood & Other Goodies
64-bit for Windows
Painter has had a lot of work done on the surface, but it has also received some attention under the hood. For the first time ever, Painter is a 64-bit application (at least on Windows – maybe next time Mac folks). Being 64-bit, it can access more RAM than today’s desktop computers can hold. This is one of the first steps in preparing Painter for the future.
Multicore Processing for Brushes
Brushes now support multicore processing which splits the painting task into pieces that are passed along to different parts of multicore processors. The more available cores, the faster brushes should work, even large ones. Even without multicore, though, the brush engine has been improved greatly in the area of speed. Large brushes do not lag as much or as easily as in past versions.
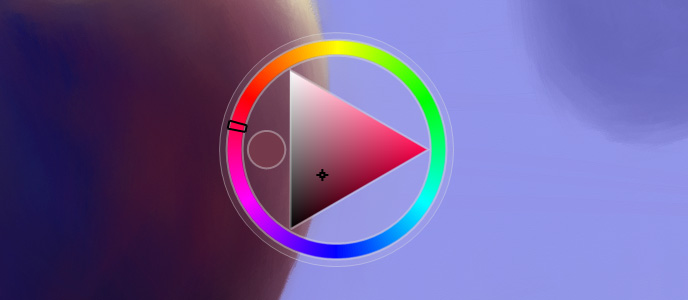
Temporal Color Palette
Choose colors quickly and easily right over your canvas with the new Temporal Color Palette. Call the palette with a shortcut key and it will appear under your brush. Choose your color and get right back to painting. The palette itself is partially transparent which allows comparison between the canvas and the color to be selected.
Brush Calibration Palette
Brush Tracking is an existing feature in the Painter preferences file. It controls mapping of pen pressure and other measurements from a graphics tablet. Setting Brush Tracking customizes the feel of all of the brushes in Painter. They are instantly tuned to the user’s painting style.
With Painter 12, Brush Tracking goes even further with the Brush Calibration palette. Every individual brush in Painter’s library can now have its own Brush Tracking preference. This leaves ultimate stroke control with the digital painter and ensures brushes feel just right.
Clone Source Palette
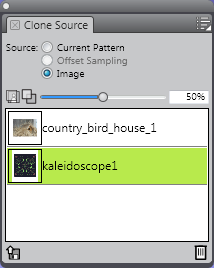
The cloning workflow has received several enhancements along with this update. Previously, only one clone source could be used at once and switching between several was not very convenient. Now, with multiple sources stored in the Clone Source palette, the switch is a single click.
With the Clone Source palette, it is now possible to keep several reference images open at once for clone painting. One common use for multiple clone sources is switching between several different color variations of a photo from other applications or saved from Painter’s own Underpainting palette. Tracing paper controls from the document window frame have also been moved into the Clone Source palette.
High Quality Display
In past versions of Painter, zoomed out views, and sometimes even the 100% view of a painting showed visible pixelation. The new high quality display smooths out all of those rough edges for both zoomed out and zoomed in views. Painter’s canvas has never looked better.
… and More
Hard to believe, but there are still more new features and enhancements. This is a HUGE update for Painter fans, bringing in enhancements from user requests over the years, stability and a few surprises from the Painter team. For an exhaustive list and video demonstrations of some of the features, head over to Painter’s page on the Corel website.
Give it a try…
To try out the new features, a free 30-day trial is available, as usual. The trial contains the entire Painter application and may be activated with a serial number just as the boxed or digital delivery edition in the Corel store. For new users, Painter 12 is currently $429 and for existing users, of Painter X and 11, upgrade pricing is $229.
For Painter’s 20th Anniversary a Limited Edition Paint Can is available in the Corel store for $449. These begin shipping on May 25, 2011.
What’s your favorite new feature?
What’s your favorite new feature of Painter 12? Have any questions? Let’s talk about it in the comments.
Just One More Thing…
- Corel Painter 12 box art features RAINBOW GEISHA by Android Jones
- Painter 12 logo is copyrighted by Corel Corporation