FlashDevelop and BlackBerry PlayBook Development: The Basics
Despite the misinformation floating around out there, the openness of the Flash Platform and the open source Flex SDK make it possible to create Flash and AIR applications without touching a single authoring tool created by Adobe. It also makes it possible for other tools and projects to be used in conjunction with the Adobe-produced tools. You’re in control of your preferred toolset, and it’s a beautiful thing.
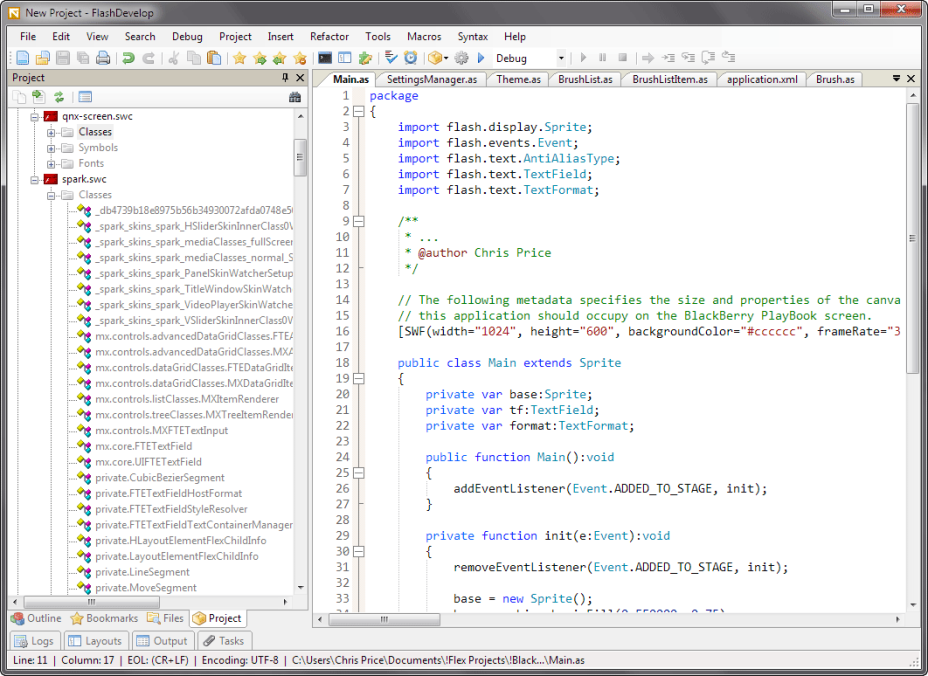
One application that is part of my toolset is FlashDevelop. It is an open source development environment for Flash Platform content. It includes features for both ActionScript (2 & 3) development as well as Flex (3 & 4) development for both Flash Player and AIR and is on par with Flash Builder in several areas and surpasses it (in my opinion) in other areas. For final output, it uses the open source Flex and AIR SDKs to compile SWF and AIR files that are identical to those produced in Adobe authoring.
Of course, the very day that BlackBerry announced that Flash Player 10.1 and AIR 2.5 would be fully supported on the BlackBerry PlayBook in the browser and as apps, I downloaded all of the required SDKs and set out to build my first PlayBook application. After downloading, installing and donating *wink* to the FlashDevelop project, the following will get you started with building your own PlayBook app.
BlackBerry Provided Resources
- Download and look over the Getting Started Guide for Windows from BlackBerry. This will give you an overview of how to install the SDK and simulator, requirements for applications and very basic instructions on using the command-line tools from the SDK.
- If you haven’t already, download both the BlackBerry Tablet OS SDK and the BlackBerry PlayBook Simulator from BlackBerry’s Tablet OS Development Resources. Install both of these using the instructions provided in the Getting Started Guide. Be sure to add the SDK to your Environment variables in the PATH variable (Windows XP | Windows Vista & 7). If you are planning to use FruitBat to manage your command line interaction, you do not need to set the PATH variable.
Make sure to NOT delete any of the other directories set in the PATH variable, as it will very likely break something horribly. When editing, it can be difficult to see what’s going on because the input is small. To make it easier, copy the entire PATH variable to your clipboard and paste into a text editor, like Notepad. Edit from the text editor. When you’ve finished, copy everything and paste it back into the PATH variable input (make sure everything is still selected) to replace the old PATH variable.
FlashDevelop Project Template
Download the FlashDevelop project template (below) and extract to either of the following locations, specific to your OS [assumes default install location for FlashDevelop & Windows 64-bit users should substitute Program Files for Program Files (x86)]:
Windows XP
- C:\Documents and Settings\[username]\Local Settings\Application Data\FlashDevelop\Projects
- C:\Program Files\FlashDevelop\Projects
Windows Vista or Windows 7
- C:\Users\[username]\AppData\Local\FlashDevelop\Projects
- C:\Program Files\FlashDevelop\Projects
When starting a new project, if you’ve extracted to Program Files, your template will be listed along with FlashDevelop’s default AS3 templates, directly after the generic AIR AS3 Projector template. If using AppData/Application Data, it will be listed in a separate AS3 category at the very bottom of the template scroll pane.
BlackBerry Tablet OS Templatev1.3.0025
This template is set up slightly different than a default FlashDevelop template. It places the application descriptor file (application.xml) in the bin folder. It also includes a default 90×90 icon for the BlackBerry Tablet OS’ home screen. It is set up like this for use with FruitBat later in the process.
Create a New Project

- Launch FlashDevelop and create a New Project through Project > New Project in the main menu.
- Choose AIR 2.5 BlackBerry PlayBook from the template list (if you’ve installed the project template from the previous section).
- Fill in project name and project folder location.
- You can enter a package path as well, but it isn’t a required option. A common format is a reverse URI scheme (ex. us.studiochris.testPackage).
- If your project folder doesn’t exist, make sure “Create Directory for Project” is selected.
- Click the OK button.
- Change the following project settings using Project > Properties… from the main menu:
- In the Classpaths tab, add the locations of any external ActionScript classes you’d like to use in your project. You can also add sources from the BlackBerry SDK here to gain access to the special QNX UI classes (you can also load SWC files into your project’s lib folder to do the same thing – explained below).
- In the Compiler Options tab, add the location of your BlackBerry Tablet OS SDK for the Custom Path to Flex SDK option. This is the only required change; however, you can also add libraries, SWC files, etc. here if you’d like.

- Click OK to save the settings changes.
- You’re all set to go!
If you don’t plan to use FruitBat to handle the command-line for your project (it doesn’t initiate connections to a remote debugging solutions), you can also change the custom command in the Test Movie section to compile your SWF without opening your application in the AIR Debug Launcher. Then, under the Build tab in the Post-build Command Line section, you can add commands to package and install a BAR file of your project to the simulator and finally bridge FlashDevelop and the BlackBerry simulator for remote debugging in FlashDevelop.
Add qnx-screen.swc to the Project
As part of the Tablet OS SDK, BlackBerry has included a set of standard UI elements and other useful classes specific to developing BlackBerry PlayBook apps. To make these classes available to your project, you’ll either need to add the path of the original AS files for these classes to your External Library Path, or copy the originals to your src folder. This isn’t the method I’d recommend though. A compiled SWC of the QNX classes is available in the SDK, and since FlashDevelop allows you to explore the classes, symbols and fonts included in SWC and SWF files, let’s import the SWC:
- Open a Windows Explorer window and navigate to your BlackBerry SDK folder.
- Navigate to ./frameworks/libs/qnx-screen. You should see qnx-screen.swc in the folder.
- Drag the SWC into the FlashDevelop window, and drop it while hovering over your lib folder. You could also copy and paste through Windows Explorer since the FlashDevelop project is just a normal folder on your hard drive.
- In FlashDevelop, right click the SWC and choose “Add to Library.”
The SWC’s filename will turn blue, letting you know it is included in the project’s library. Code hinting, completion and importing will work automatically with the contents of the qnx-screen SWC. Even without adding it to your library, you can explore the SWC’s contents by clicking the + icon beside the SWC in the Project Panel.
Write the App’s Code
As for writing your app, write ActionScript 3 just as you would with any other AIR application. For user interface work, the classes inside of qnx-screen are recommended since these are the “native” AIR components for the PlayBook. They will help keep your app’s look and feel consistent within the BlackBerry PlayBook environment. The full API reference for the QNX classes is available directly from BlackBerry in familiar ASDoc format.
You aren’t limited only to the contents of the QNX classes though; you can use any of the Flash Player and AIR APIs and classes with very few exceptions. The exceptions that I’m aware of right now deal with video playback and display of HTML content. Both of these have PlayBook specific implementations. More info can be found in the BlackBerry Tablet OS Development forum.
At present, all of the planned features of Tablet OS are not complete, so the simulator is incomplete. For instance, there isn’t a web browser available, and you won’t be able to work with the camera, accelerometer, or multitouch APIs for now. These will be available in a later version of the SDK and Simulator.
Create Resources for your App
To create visual components for your app, you can use your favorite image editor or any of the Adobe tools. Personally, I use Photoshop, Illustrator
and Flash Professional
to create all of my visual elements – Flash and Illustrator mostly. I create a library of symbols in Flash and export them for ActionScript as a SWC. The resulting classes are imported just like the QNX classes above.
You could just as easily use the ActionScript 3 drawing API to draw exclusively in code, or use GIMP, Inkscape, Blender, Corel Painter 11, Paintshop Pro Photo X3
, CorelDRAW Graphics Suite X5
or even Microsoft Paint. The choice is yours.
As they are created, place all of your resources in the bin folder of your FlashDevelop project. Everything in the bin folder will be available to both FruitBat and ADL (the AIR Debug Launcher)1. You can organize your assets as you wish in subdirectories nested as deep as you need.
New to ActionScript 3?
I’m not going to get into a full ActionScript 3 tutorial, but there are tons of resources online to help you get started. Here are a few:
Of course, a lot of the resources you’ll find will show Flash Builder, Flash Professional or any number of tools, but remember, you’re after the coding techniques and examples. Also, FlashDevelop is a great complement to the tools produced by Adobe, so if you have them available use them together!
As for books, I would have run away screaming if it hadn’t been for the ActionScript 3.0 Bible. I have the first edition
, which costs a bit less (now) and is a little outdated with where ActionScript 3.0 is today, but I still find it very useful. It does provide reference for all of the basic classes as well as an introduction to object-oriented programming.
One very small warning, so it doesn’t catch you by surprise (if you’re a designer): This is a programming book, and it is written for programmers. Do not expect to learn visually from this book, though it does have some small images to display output. The artsy side of my mind had a hard time understanding everything at first, but don’t give up. As you get experience, create live examples and see how everybody else does it, things will start making sense.
Test the App in the Tablet OS Simulator
Once the code has been written, you’ll want to test the app in the PlayBook simulator, but how to get it there? The Tablet OS SDK includes a batch of command line tools to package, install and uninstall your app to and from the simulator. Basic examples can be found in the Getting Started Guide for Windows referenced earlier. I’ve automated all of the command line features in FruitBat, though, so I won’t be going into using the command line manually.
Prepare the Simulator
- Boot your simulator virtual machine in VMware Player.
- Click the Gear icon in the simulator to access the Settings pane.
- Enable Development Mode in the Security section by clicking the Enable button.
- Click the Hammer icon from the top menu strip.
- Write down or memorize the IP Address assigned to the simulator; you’ll need it later.
The simulator’s networking sometimes takes a couple of minutes to register itself, especially if you’re using a restored state of the VM instead of a fresh boot. If you get an error saying the simulator can’t be reached from FruitBat, and you know it is available, wait a few seconds and try again.

Compile the SWF File
- If you haven’t already, open application.xml and change any of the necessary settings, like
versionNumber,descriptionandcopyrightand save the changes. - In FlashDevelop, either click the Debug/Test Movie button or use Ctrl+Enter, like in Flash Professional, to test your project. This will compile the SWF and open it in ADL.
Running in ADL isn’t especially important with PlayBook development, but can be useful. With testing your movie, all you really need is the SWF file that’s created before ADL launches. You can even suppress ADL from launching when you create the SWF.
Use FruitBat to Package and Install to the Simulator
- Open FruitBat.
- Fill in and save the settings if you haven’t already.
- In FlashDevelop, right click the bin folder in the Project panel and choose Explore. You can also navigate to this folder in Windows Explorer.
- Drag application.xml onto FruitBat and drop it.
- Click the Package and Install button.
- The command line window will let you know what’s happening, and you can safely close it when it has finished with the Exit button or by pressing any key.
- Switch over to the simulator, and you should see your app running.
You do not have to uninstall between versions of your app if you don’t want to. When installing, if the application already exists, it is automatically uninstalled before the install procedure runs.
You can also use FruitBat alone to help fine-tune your icon. The drop shadow in the main display is as close as I could get it to the automatic drop shadow in Tablet OS. Full transparency is also supported in your icon.
If you decide to abandon a project, uninstall it from the simulator BEFORE you trash the files. The BAR file can be used to uninstall via FruitBat by using the File menu. You can also drag the descriptor into FruitBat and use the arrow buttons to switch between Package & Install, Install and Uninstall. If using the Install and Uninstall buttons, be sure the you’ve used Package & Install at some point and that a BAR file exists for the project, since the BAR file is used for installing and uninstalling without packaging.
There also seems to be a bug in the simulator with freshly installed apps. If you’re using the regular Install command, the app will be installed, but the simulator doesn’t show it right away in the app tray on the home screen. To refresh, use the “minimize” gesture mentioned below on the main screen, or click the arrow button to the right of the app tray’s category bar.
Basic Simulator Use
Swiping Gestures
Swiping gestures work in the simulator just like drag and drop on the desktop. Hold down your mouse button and drag in the direction you’d like to swipe. After the swipe, release the mouse button. Play around to find all of the functions. Several navigation methods in the OS use swipe gestures. You can swipe within the simulated screen as well as from the black border of the simulator window toward/into the simulated screen.
Exit an App
If you haven’t built in an exit button to close your app, swipe from the bottom black border of the simulator to “minimize” your app and click the OS-provided “X” button to exit.
Useful FlashDevelop Features
FlashDevelop is full of useful, time-saving features. These are just a few, but if you’d like to know more, the FlashDevelop wiki outlines everything! Additional help may be available in the FlashDevelop Community Forums as well.
Code Hinting and Completion
Code completion and hinting are automatic for every class available to your project, even if it doesn’t have an import statement in your file yet. You don’t have to do anything special; the classes don’t need any special preparation. It just works!

Code completion and automatic tag closing is also available for much of the Flex SDK in MXML documents as well as HTML and normal XML, so you can create any supporting document files in FlashDevelop as well.
Automatic Imports & Import Organization
You can explicitly type imports at the head of your class or let FlashDevelop handle them for you. Any time you add a new variable type, FlashDevelop will add the import statements for the necessary classes. Just keep typing. The only thing you’ll notice is that the line numbers shift and your class name will turn teal if you use the default code color scheme.
When you’ve finished typing up a class, use Refactor > Organize Imports to clean up the import section. It’ll delete all unused import statements and group all of the remaining statements by package name.
The Magic Shortcut
If you only learn one shortcut for FlashDevelop, learn this one…
Ctrl+Shift+1
It handles a lot of automatic code generation. It can create event handler functions, change public variables to private and create getter and setter functions, handle automatic imports and declare variables on the fly. It is one of my favorite features in FlashDevelop. It saves so much time!

To use it, place your cursor either inside, directly before or directly after the term that needs the magic touch. Use the shortcut. For class imports, you don’t have to do anything else; you’ll notice the class name turns teal instantly. This lets you know that the import is done (useful for constants in static classes like BitmapFilterQuality). Where functions and variables are to be created, you’ll be presented with a code-completion dropdown with macros that are available for the specific “selected” item. Select one and it’s done!
Other Features
- Snippets (Ctrl+B) and macros for common functions. You can add your own as well.
- SWF Profiler to monitor memory usage for your app.
- Variable inspection at breakpoints in debugging sessions – impressive! The standard variable properties panel, like in Flash Professional, is available, but you also get interactive inspection. Highlight any variable or property in your code and hover over the selection for a second and a secondary inspection panel, specific to the highlighted item, opens. Your Tablet OS projects, for the most part, should run in ADL as well as the simulator. Most of the QNX AIR components work perfectly in ADL.

base doesn’t have any event listeners attached, so if it were removed from the display list and nothing else held a reference to it, it would be eligible for garbage collection.Moving Forward
These basics should give you a good starting point for developing your first app for BlackBerry PlayBook or any other project using FlashDevelop. The possibilities are endless; what will you develop?
- The bin folder is the application directory for ADL. Its location is linked to File.applicationDirectory as well as app:// while testing.