Moving in at Meridian – Part 4

In the last post, the original measurements were transformed into a working floor plan using a scale drawing created in Adobe Illustrator. Before I post photos, let’s take a virtual walk through of the layout along with some explanation of some of the creative solutions used to maximize the space in the studio.
The Lobby
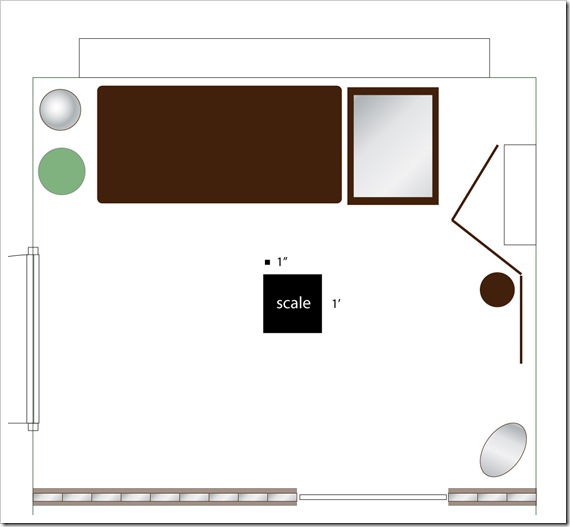
Stepping in through the front door, I established a “lobby” area outfitted with a lamp, a comfy, oversized ottoman with storage inside (the space is small – storage in every nook and cranny is very important to maintain a neat space), a plant for a bit of softness and a small decorative file cabinet, coordinated to my desk, that also serves as a magazine stand and end table. My studio also happens to hold all the utility hookups for the entire building that had to be hidden, so I chose a freestanding screen with circular mirror accents and decorative urn with an 8′ tall natural arrangement to disguise those.
The Gallery
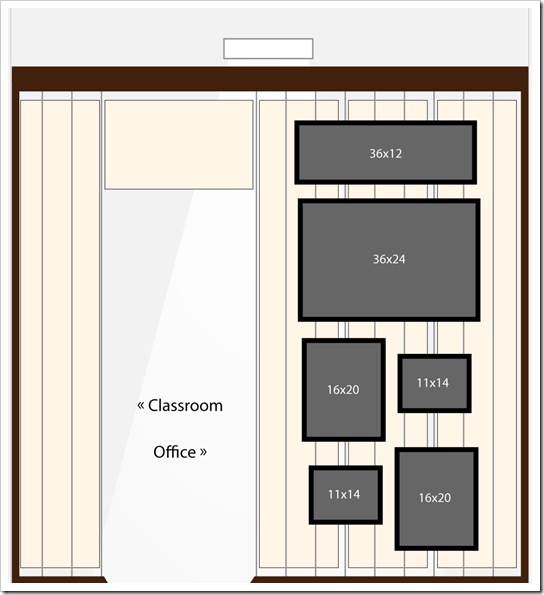
To separate the lobby from the rest of the space which is destined to become my office and a classroom for a small group, I had to come up with a solution for some sort of room divider. With floor space at a premium, I chose to design something custom and to stay really simple with a wooden box frame with an opening for a “doorway.” To fill the “divider” part of the equation, 12 steel cables were strung from the floor to the top of the frame, and for privacy, along with Alice of Splash Designs (across the hall!), 4 vertical canvas panels were created to hang freely behind the steel cables.
The final result is a multipurpose, lightweight wall. I get a separated spaces, a little privacy for the office and as a bonus, with a little hardware for the steel cable, I also have a complete gallery system to hang paintings, prints, other products and a projector screen inside the office!
The Office
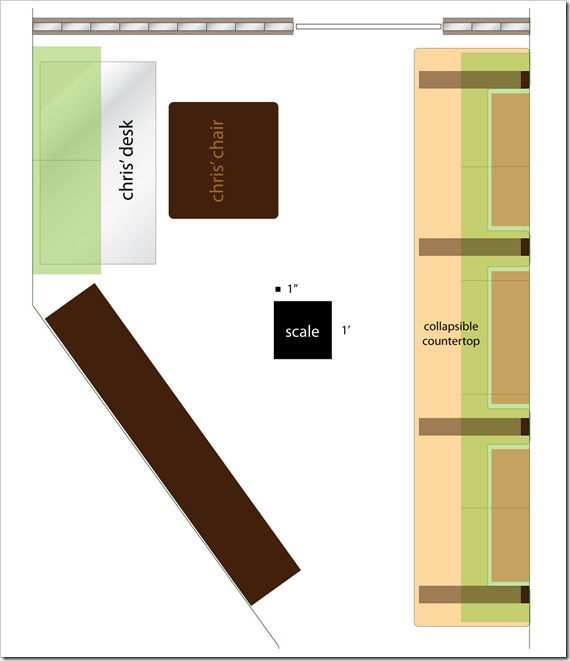
Moving from the lobby into the office and classroom area, the key to using the space effectively was to use the 20′ ceilings of the space to my advantage and use the wall space as opposed to using floor space. I chose a small desk made of wood and glass (the glass helps it disappear, leaving the area with a larger feeling) that will comfortably hold my computer equipment and a comfy leather chair. Above my desk are two wall cabinets for storage. The angled wall contains a large, yet shallow bookcase with two shelves mounted above for plenty of space to house books, magazines, art supplies (it is also an art studio, after all) and more. This half of the room is effectively my office; however, the other side of the room, on the long wall is far more exciting – a full classroom and complete painting studio!
The Classroom
My favorite part of the space is without a doubt the classroom/meeting area/painting studio (yes, I paint with real paint occasionally). With the long, narrow room and having to accommodate so many different areas for the space to be functional for my purposes, I needed to find a way to incorporate a learning area as well as a space for my work in traditional media that could tuck away when not in use, yet still comfortable when in use. I found the perfect solution at IKEA – wall mounted laptop desks!
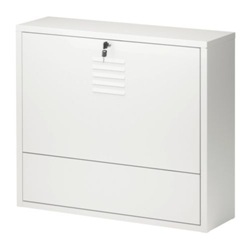 Closed – Only 7″ deep, complete with a clean look and a lock Closed – Only 7″ deep, complete with a clean look and a lock | 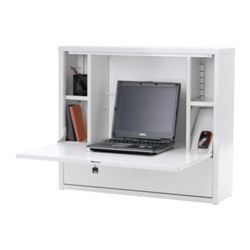 Open to a full 24″ desk depth with enough space for a 17″ laptop |
I was able to comfortably fit three of these on the long wall meaning, with my desk, I can host intimate workshops and private tutoring in all forms of digital art and content creation for up to 4 people at once. With such small groups, the learning time can be maximized to the fullest! Keep watching for the schedule – I hope to be able to start sometime in November.
In addition to the laptop workstations, I added even more storage with overhead wall cabinets.
The Painting Studio
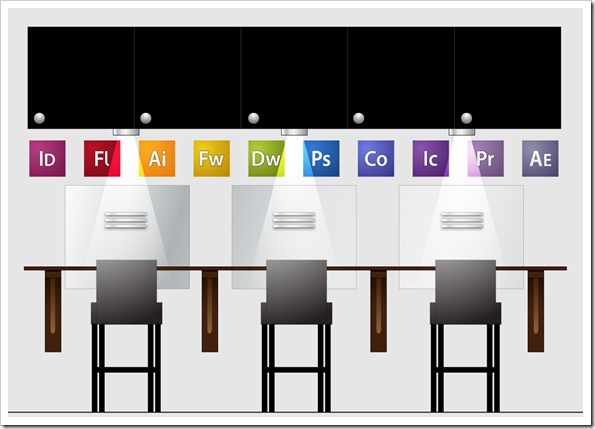
Staying in the classroom area, I needed a place to spread my miscellaneous painting supplies while I work on traditional canvases and other projects, so once again, I look to the long wall. Even with the laptop workstations in place, there is still potential to max out the space. The final solution is a collapsible/removable counter that is notched to accommodate the laptop workstations. The beauty of the counter is that it gives a large workspace that is comfortable to work at while standing or sitting (using the comfy, cushioned stools for the workstations). The counter can also remain standing and not impede the use of the laptop workstations or it can be completely removed with the counter itself being tucked away and its supports folded down to the wall.
All together, with some added lighting, the full classroom area is warm and extremely useful for a lot of different purposes. The space is completely maximized in terms of functionality vs. space. Armed with the scale drawing from Illustrator, here’s the conceptual drawing for that area:
The Inside Entry
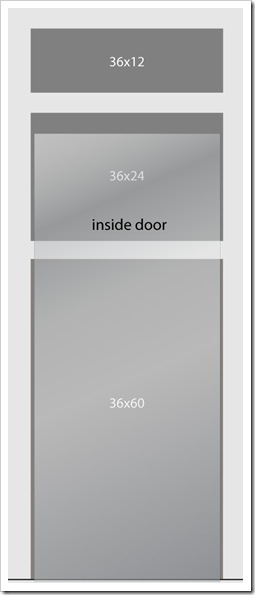
The last area of the studio is a narrow entryway located at the “back” of the studio, inside of the Meridian building (the front door is inside the outdoor entry to the building). Of course, I can’t leave that space completely blank, so using two extra cables from the dividing gallery wall, I have yet another gallery hanging space that is visible through the full length glass door.
And that concludes the virtual tour. While long, I hope this post contains some ideas for those of you planning your own studio spaces. Use that space wisely! Even though I do have a lot of “stuff” in the studio, the overall feel is still very open, airy and dare I say – spacious!
I’ll have some photos for the next post!